CLICK HERE FOR THOUSANDS OF FREE BLOGGER TEMPLATES »
Showing posts with label Desserts. Show all posts

Sunday, June 20, 2010

Happy Father's Day!

In honor of my wonderful husband on his first Father's Day, I made him a special treat. This is something I would never in a million years make, except he loves it. I do not. Which means that this whole entire pie is his. I wonder how long it will take him to eat the whole thing?

When I first met my husband, his love of all things coconut grossed me out. Macaroons, German chocolate cake, coconut cream pie. Anything with coconut is loved by him. I do not love coconut (the texture is odd to me). I have learned to like it over the years, but I still do not love it. If it's placed in front of me in dessert form, I will eat it. I can't not give my husband his favorite thing, so off to make a pie I went.

He gets a German chocolate cake every year on his birthday. This year for his first Father's Day, I tried my hand at a coconut cream pie. I never realized how easy a cream pie was to make. I assumed I had to boil the filling to make it thick. This particular recipe required no boiling. I just needed to measure and mix.

This morning, at 7:00 am, while the wee one was sleeping, I went to work on the pie. It took me a grand total of 15 minutes to make. I will fully admit that I did not make the pie crust from scratch. If I had, it would have added a significant amount of time to my pie baking adventures.

The pie baked up beautifully, but it's missing something. I realized after about an hour what is missing: Whipped cream on the top. Don't coconut cream pies usually have a ginormous mound of whipped cream on them? Thankfully, I have some whipping cream in the refrigerator from a recipe a couple of weeks ago. Because I am a good wife, I will whip that up and top the husband's pie. He darn well better not ask for Cool Whip.

Here is the lovely pie before the whipped cream.

How did this taste? I have no idea. I don't like coconut remember? The pie sure looks pretty (with the exception of a little burnt edge. My oven has hot spots).

Coconut Cream Pie

1 pie crust
3/4 cup sugar
2 tablespoons flour
2 eggs
1 cup milk
2 teaspoons butter
1/8 teaspoon ground nutmeg
1 cup flaked coconut

1. Mix together sugar, flour and nutmeg. Beat in eggs. Add milk and butter and stir. Stir in coconut. Pour filling in unbaked pie shell.

2. Bake at 425 degrees for 20 minutes.

Here is the lovely pie after the whipped cream. I would like to point out that by the time I took this picture, half the pie was consumed.

Thursday, April 8, 2010

Bananas.......Yummmmm

Welcome back to the blogging world Pachey! Like I have stated previously, I haven't been cooking or baking much. Tonight, after the wee one went to bed, I decided to remedy that. I actually baked! Alert the media.

I had about five pathetic looking bananas and I didn't want them to go to waste. What do you typically do with overripe bananas? In my house, I make banana bread. Why mess with tradition right? However, I did mess with tradition. When I mentioned to my husband that I was going to make banana bread, he very kindly told me that I should look for a new recipe. He isn't fond of my old one apparently.

Off to trusty allrecipes.com. I typed in banana bread and used the very first recipe that came up. I only made one addition, which was the tasty and yummy addition of some chocolate chips. I personally think that chocolate chips and banana go together very well.

This recipe came together quickly, which is a positive in my house. You just never know when the baby is going to wake up. I also liked that it used up all five of my browning bananas. I had all the other ingredients on hand since they are regular baking staples.

This bread was delicious! Very moist and super chocolately with the addition of my chips. I had two pieces. After all, I have officially lost all my baby weight and I can afford to have a few extra calories in my diet. Yummmmm!

Banana Banana Bread
from: http://www.allrecipes.com/

2 cups flour
1 teaspoon baking soda
1/4 teaspoon salt
1/2 cup butter
3/4 cup brown sugar
2 eggs, beaten
2 1/3 cup mashed overripe bananas

1. Preheat oven to 350 degrees. Lightly grease a 9x5 inch loaf pan.

2. In a large bowl, combine flour, baking soda and salt. In a separate bowl, cream together butter and brown sugar. Stir in eggs and banana until well blended. Stir banana mixture into flour mixture; stir just until moistened. Pour batter into pan.

3. Bake for 60 to 65 minutes or until a toothpick comes out clean.

* Note: I added the chocolate chips after the banana mix and flour mix were added. I did not stir very much because I didn't want to make the bread tough.

Sunday, January 24, 2010

Unchocolate Brownies

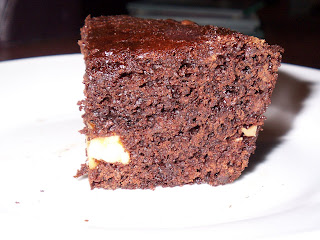
Tonight was one of those nights where brownies just sound good. I haven't cooked or baked a lot lately since we are trying to get the house ready for the bean. I have been cooking mostly easy, convenience meals (baked chicken breasts, spaghetti and sausages, ready-made frozen lasagna) which is fine, just not blogger friendly.


Never fear, a day off is here! I didn't have much to do today which meant I was free to cook and bake. While I made an easy dinner (baked chicken, mashed taters and beans), I wanted something a little more special for dessert. Enter the brownie. If you notice, that is a trend in my blog. It's my go-to dessert mostly because it's easy and so delicious.

The funny thing with this recipe was that I was halfway through making them when I realized there was no chocolate in them! Blasphemy! Oh, but I improvised. The recipe called for 1/2 cup of chopped peanuts, which we didn't have. So the next best thing? Chocolate chips! I did get my chocolate fix after all.

These brownies were easy to prepare and mighty tasty. I ate one slightly warm from the oven with a glass of milk. They were much more rich than normal and I think this is due to the use of brown sugar rather than the regular white. I like that there is very little butter. It makes me feel less guilty for eating one....err two. Not that peanut butter is very waistline friendly, but oh well. I am 37 weeks pregnant. At this point, I don't much care about the food I am consuming.

I would definitely recommend these brownies. If you want to add peanuts instead of the chocolate chips, feel free. If you are like me, you need a little chocolate, and what goes better with peanut butter than chocolate? NOTHING! The recipe doesn't specify, but I suppose for some extra crunch, you could use chunky peanut butter. I used creamy since Jason is pretty territorial over who eats his chunky peanut butter. He probably would have forgiven me pretty quickly after he tasted these beauties though.

Peanut Butter Brownies

1/2 cup peanut butter
2 eggs
1 teaspoon vanilla extract
1 cup packed brown sugar
4 tablespoons butter, softened
2/3 cup flour
1 teaspoon baking powder
1/4 teaspoon salt
1/2 cup salted peanuts, chopped (or chocolate chips)

1. Preheat oven to 350 degrees. Grease an 8 inch square baking pan.

2. In a large mixing bowl, cream together the peanut butter and the butter. Add the brown sugar, vanilla and eggs and beat until light and fluffy. Combine the flour, baking powder, and salt in a separate bowl. Add to the butter mixture and mix well until blended. Stir in the peanuts (or chocolate chips).

3. Spread batter evenly into pan and bake for 25 to 30 minutes or until toothpick comes out clean. Let cool on a wire rack and cut into 2-inch squares.

Sunday, January 3, 2010

It's Not a Cookie

Yes, I have been a bad blogger. I have said it before, but really, this time I have an excuse. I was at first busy with pregnancy and getting the house ready for our baby, but then nature called and I actually HAD my baby. So there. I have been a bad blogger because I have been busy being a mommy.

Much of my cooking and baking these days comes out of convenience. Boxed meals (for shame!) like frozen lasagnas from Costco, or meals that I can make in the crockpot that are very quick and easy are in my arsenal. Most of what I have cooked are repeats which is another reason for the lack of blog posts. I have made Salsa Chicken, Chili, The Family Spaghetti, and simple things like baked chicken or pork chops. Nothing terribly exciting to blog about.


This recipe is one from the archives. I had already started the post and now I am finishing it. Oh, about 2 months later! This recipe was made for New Year's for our family get together. Yes, New Years. Did I mention I was a bad blogger?


So without further ado.............Drum roll...............From the archives:


This recipe comes from my Tollhouse Cookie Cookbook. That being said, it's not a cookie. It's not even really a cheesecake although that's what the name implies. It's more like a bar with cheesecake accents (if there is such a thing). What I can tell you is that they were D-LICIOUS.


They were fun and easy to make. I whipped them up on the same night that I made the Stuffed Jalapenos for my husband's and my New Year's celebration. While these cheesecake bars were baking, I worked on some other items.


I used my KitchenAid mixer to make these and it was very convenient because they were able to chill in the fridge overnight. The next morning, all I needed to do was cut them and plate them. Did I mention they were yummy and delicious? Thankfully, there were leftovers and my then pregnant butt was able to eat them when I got home.


Another great thing about this recipe was that it didn't take a lot of ingredients that I didn't have on hand. I only had to buy graham crackers (which I ended up consuming the rest of the box anyways so certainly no loss), cream cheese and evaporated milk. I had everything else on hand.


I would suggest that you either buy already crushed graham cracker crumbs, or you use a food processor to make the crumbs. I used my mini food processor and it worked perfectly! It is a much more cost effective option to go this route obviously. But if you are pressed for time, definitely buy the crumbs. Please also note that the recipe does not have a typo. It really does take a tablespoon of vanilla extract.


I would most certainly recommend these bars. For a potluck, a family get together or just a yummy dessert for no special occasion.


Swirl-of-Chocolate Cheesecake Triangles
from: Nestle Tollhouse Best Loved Cookies


Crust:
2 cups graham cracker crumbs
1/2 cup (1 stick) butter or margarine, melted
1/3 cup granulated sugar


Filling:
2 packages (8 oz each) cream cheese, softened
1 cup granulated sugar
1/4 cup flour
1 1/2 cups (12-fluid-ounce can) evaporated milk
2 eggs
1 tablespoon vanilla extract
1 cup (6 oz) semi-sweet chocolate chips


For crust: Combine crumbs, butter and granulated sugar in medium bowl; press onto bottom of ungreased 13x9 baking pan.


For filling: Beat cream cheese, granulated sugar and flour in large mixer bowl until smooth. Gradually beat in evaporated milk, eggs, and vanilla.


Microwave chocolate chips in medium, microwave safe bowl on high power for 1 minute; stir. Microwave at additional 10 to 20 second intervals, stirring until smooth.

Stir one cup cream cheese mixture into chocolate. Pour remaining cream cheese mixture over crust. Pour chocolate mixture over cream cheese mixture. Swirl mixtures with spoon, pulling plain cream cheese mixture up to surface.

Bake in preheated 325 degree oven for 40 to 45 minutes or until set. Cool in pan to room temperature on wire rack; chill until firm. Cut into squares; cut each square in half diagonally to form triangles.

Saturday, November 28, 2009

Is it a Cookie or a Pie?

I will let you decide. This recipe is inspired by a trip to the beach that my husband and I took a few months ago. We went to a restaurant for dinner and while dinner was good, dessert was MUCH better. I had honestly forgotten about this pie until Jason mentioned it a few weeks ago. "You know what you should make? That Toll House Pie from the beach". Oh dear. Once he mentioned it, I couldn't forget about it.


So, I went searching for a good recipe online. I think this one comes pretty close. It wasn't identical to the one at the restaurant, but with a little tweaking, I can get it to work.

I know it sounds weird. The same ingredients that go in the cookies go into a pie. Of course, it isn't exact. For one, you have to beat the eggs until super foamy. You don't do that for the cookies. Trust me on this, it's very good. I know it sounds bizarre to put cookie batter into a crust, but it really isn't cookie batter. It's a little thinner. If you were to add the walnuts (which I didn't), it would probably have been thicker.

Here is what the pie looks like before baking. See? Not as thick as normal cookie batter.


When it bakes up, the top will become very brown, and that is okay. It's what it's supposed to do. Let it keep baking. The last thing you want to end up with is an undercooked center. I prefer a warm slice of pie, so I cut into it about 20 minutes after it came out of the oven and it was perfectly fine. You can always heat it up in the microwave as well.

This was very good! If I need to bring a dessert with me to a potluck anytime soon, I might bring this. It's unexpected and delicious. After all, who doesn't love some Toll House Cookies, errr, I mean pie?


Toll House Pie

2 eggs
1/2 cup flour
1/2 cup sugar
1/2 cup firmly packed light brown sugar
3/4 cup butter, softened
1 cup chopped walnuts
1 cup (6 oz) Nestle Toll House semi-sweet chocolate chips
1 (9 inch) unbaked pie shell
whipped cream or ice cream, optional

Preheat oven to 325 degrees. In a large mixer bowl, beat eggs at high speed until foamy, about three minutes. Beat in flour, sugar, and brown sugar until well blended. Beat in softened butter. Stir in walnuts and chocolate chips. Pour into pie shell.

Bake 55 to 60 minutes or until knife inserted in halfway between the edge and center comes out clean, and top is golden brown. Cool on wire rack. Serve with whipped cream or ice cream.

If using frozen pie shell, use deep dish style; thaw completely. Place on cookie sheet; increase baking time by 10 minutes.


Even More Pumpkin!

Sorry about my lack of blogging lately. In between doubling up on classes, getting ready for the bean, not cooking a whole lot and the holidays, I have been a slacker. So, I will spend some time today updating.

I made this recipe several weeks ago. I had some leftover canned pumpkin in my fridge and I didn't want it to go to waste. After all, I can never pass up an opportunity to bake. I went in search of a recipe that was both healthy (because I am trying not to gain too much pregnancy weight) and tasty, well because let's face it, taste is the most important aspect.

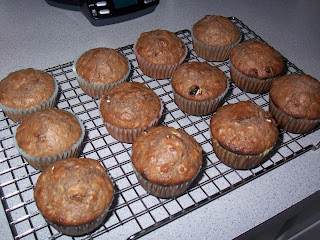
I believe this is the first time I have used a recipe from cooks.com and I certainly wasn't disappointed. I found a lowfat muffin recipe (140 calories per muffin and only 4.6 grams of fat) that was really tasty. I only altered one thing and that was the sugar. I used half sugar and half Splenda. If you use all the sugar that the recipe calls for, it only adds a few calories per muffin. Not enough to worry about.

This was very easy to throw together. So much so that on a night before class, I whipped these up and brought in a batch for my classmates. It took less than an hour to make and bake and package them up.

I put the label for this recipe as a dessert and breakfast because I feel that pumpkin and raisins are appropriate all times of the day. So if you are looking for a quick breakfast, grab one of these muffins and a cup of coffee and you are all set!

These muffins don't have an overpowering taste of pumpkin. I love pumpkin, so it doesn't bother me how much is in a recipe, however, some people don't care for pumpkin. These muffins have a very nice pumpkin accent. It is one of the main ingredients, but even if you don't care for pumpkin, I think you would like these. They result in a very moist, muffin. I suggest eating them while they are still warm. They were the most tasty that way!

Be careful not to overmix the batter. Follow the directions and only mix until the flour is moistened. I really think the muffins were moist because of this. The more you mix, the tougher the muffins will be. Also, don't be afraid to add more spice than the recipe calls for. I always add a little extra cinnamon and nutmeg to things. It gives more depth (doesn't that sound fancy?) to the recipe in my opinion.

Pumpkin Muffins
from: www.cooks.com

1 1/2 cup flour
1/2 cup sugar (I used half Splenda and half sugar)
2 teaspoons baking powder
1/2 teaspoon salt
1/2 teaspoon cinnamon
1/2 teaspoon nutmeg
1/2 cup milk
1/2 cup canned pumpkin
1/4 cup butter, melted
1 egg
1/2 cup raisins

Heat oven to 400 degrees. Grease bottoms of 12 medium muffin cups. Mix all ingredients just until flour is moistened. Batter should be lumpy. Fill muffin cups 2/3 full. Sprinkle 1/4 teaspoon sugar over batter in each cup. Bake 18 to 20 minutes. Immediately remove from pan.

Aren't these beautiful when you cut into them?


Sunday, October 25, 2009

More Pumpkin

I told you that I have wanting pumpkin lately! It's fall after all and nothing says fall like pumpkin and spice. So, here goes. This recipe is one that I pulled out of Cooking Light this month. I am less likely to feel guilty about baking if the recipe is one that is from Cooking Light. Maybe it's all in my head.

The picture is what drew me to this. A delicious looking cake with a nice cream cheese frosting. While cream cheese frosting isn't my favorite, I can make special exceptions. Plus, the best part? It's light!

My picture didn't turn out quite as pretty as the one in the magazine, but that's okay. Case in point:

My cake is flatter then the picture. I do have to say though, I cut this piece from the flattest part of the cake. The rest is much more springy and less condensed. Operator error I am sure.


The end results were very good! And anything when I can use my Kitchenaid is a good thing. Confession: I sometimes look for recipes that calls for a mixer just so I can use mine.

This is a moist cake made so by the canned pumpkin. It really is the star of the cake. After all, it wouldn't be a pumpkin cake without the pumpkin. The brown sugar gave it richness that white sugar couldn't, and the fact that it doesn't have much fat (butter) in it, is what makes it light.

The frosting does have a lot of powdered sugar and butter and cream cheese in it, but you aren't eating that much icing. The majority of the serving size is cake. Plus, the pieces are cut small which also helps in keeping this cake well under 200 calories a piece.

Frosted Pumpkin Cake
from: Cooking Light Magazine November 2009

Cake:
10.1 ounces flour (about 2 1/4 cups)
2 1/2 teaspoons baking powder
2 teaspoons ground cinnamon
1/4 teaspoon salt
1 cup packed brown sugar
1/4 cup butter, softened
1 teaspoon vanilla extract
2 large eggs
1 can (15 ounces) pumpkin puree
cooking spray

Frosting:
2 tablespoons butter, softened
1/2 teaspoon vanilla extract
1 package (8 ounces) 1/3-less fat cream cheese
2 cups sifted powdered sugar

1. Preheat oven to 350 degrees.

2. To prepare cake, weigh or lightly spoon flour into dry measuring cups; level with a knife. Combine flour, baking powder, cinnamon, and salt in a small bowl, stirring with a whisk.

3. Combine brown sugar, 1/4 cup butter, and 1 teaspoon vanilla in a large bowl; beat with a mixer at medium speed until well combined. Add eggs, 1 at a time, to sugar mixture; beat well after each addition. Add pumpkin; mix well. Fold in flour mixture. Spread batter into a 13x9 inch baking pan coated with cooking spray. Bake for 25 minutes or until a wooden toothpick inserted into the center comes out clean. Cool completely in pan on a wire rack.

4. To prepare the frosting, combine 2 tablespoons butter, 1/2 teaspoon vanilla, and cream cheese in a medium bowl; beat with a mixer at medium speed until combined. Gradually add the powdered sugar, beating until well combined. Spread frosting evenly over top of cake.

Sunday, October 4, 2009

Bite Sized Goodness

I found this recipe from someone else's blog (http://www.adventuresinmyfreezer.blogspot.com) and I decided why not? After all, I love brownies. That is obvious based on the several brownie recipes I have posted before. Secondly, I figure this is portion control. Right? I can only pop one or two of these before I start to feel guilty.

These are very simple to make and awfully cute. I know my sister will agree. She likes mini things. Mini horses, mini dogs, mini cupcakes, you get the picture. As I was taking these out of the muffin cups, one accidentally broke. I can't tell you how disappointed I was. I had to eat it! Isn't that terrible? I ate it and it was mighty tasty.

These whipped up in no time. Being the nice person that I am, I am considering taking a batch of these to class with me on Wednesday. It depends on my mood and if I am feeling generous or not.

I would definitely recommend these and encourage you to make a batch. People won't be able to stop saying "awww, those are so cute!". Plus, they are really yummy with a glass of milk.

Two Bite Brownies
from: http://adventuresinmyfreezer.blogspot.com/2008/12/two-bite-brownies.html

Preheat oven to 350 degrees. Grease 24 mini-muffin cups (or an 8x8 pan).

In a large bowl, mix:
2 eggs
1 cup white sugar

Add:
6 tablespoons cocoa powder (about 1/2 cup)
1/3 cup vegetable oil or melted butter
Mix well.

Add:
2/3 cup flour
1/2 teaspoon salt
1/2 teaspoon baking powder
1 teaspoon vanilla
Mix well again.

Use heaping teaspoons to fill mini-muffin cups. Bake 10-12 minutes (watch carefully). For an 8x8 pan, bake for 25 minutes.

Sunday, September 27, 2009

Announcement Cupcakes

I wanted a fun way to announce to my coworkers which gender of baby I am expecting. So, I decided on cupcakes. After all, who doesn't love cupcakes? My plan of attack was to bring in cupcakes that were either frosted in pink or blue. I have to be honest, I am glad they will be blue because I am not a fan of pink.

These cupcakes were delicious! I know because not only did I lick the batter bowl, I also ate one after dinner tonight. Any time I want to make an easy but yummy cake or cupcake recipe, I resort to the Cake Doctor. If you haven't checked out her cookbooks, you are missing out! The whole theme of the book is to take a regular boxed cake mix and add things to it. Honestly, every cake I have made you absolutely cannot tell it's from a box. And when I tell people, they don't believe me.

This recipe is very versatile. The title in the book says it all: Chocolate Sour Cream Cupcakes with Ten Different Buttercream Frostings. If you cannot find a frosting that you like, you must be the most picky person on the face of the planet!

Being pregnant around chocolate is sheer torture. Not only did I have to smell these puppies baking, but I had to wait several hours to eat one. Really, they were staring me in the face all afternoon. Stupid chocolate cravings.

I decided on the White Chocolate Cream Cheese Frosting. I am usually not a fan of cream cheese frostings, but like I said before, it's the Cake Doctor. You really can't go wrong. Plus, I wasn't sure how picky my coworkers would be if I brought in Orange-Cocoa Cream Cheese or Crushed Peppermint Buttercream.

Try these cupcakes out. You won't be disappointed. And maybe you will bring them to work to announce something fun too!

Chocolate Sour Cream Cupcakes
from: The Chocolate Cake Mix Doctor

22 to 24 paper liners for muffin pans
1 package (18.25 oz) devil's food cake mix
3/4 cup water
1 cup sour cream
1/2 cup vegetable oil
3 large eggs
1 teaspoon pure vanilla extract

1. Place a rack in the center of the oven and preheat the oven to 350 degrees. Line 24 muffin cups with paper liners. Set the pans aside.

2. Place the cake mix, water, sour cream, oil, eggs and vanilla in a large mixing bowl. Blend with the mixer on low speed for one minute. Stop the machine and scrape down the sides of the bowl with a rubber spatula. Increase the mixer speed to medium and beat 2 minutes more, scraping down the sides again if needed. The batter should look well combined. Spoon the batter into the lined muffin cups, filling each liner three quarters of the way full (You will get between 22 and 24 cupcakes; remove the empty liners if any). Place the pans in the oven.

3. Bake until they spring back when lightly pressed with your fingers and a toothpcik comes out clean, 20 to 25 minutes. Remove the pans from the oven and place them on wire racks to cool for 5 minutes. Run a dinner knife around the edges of the cupcake liners, lift the cupcakes up from the bottom of the pan using the end of the knife and pick them out of the cups carefully with your fingertips. Place them on a wire rack to cool for 15 minutes before frosting.

4. Meanwhile, prepare the frosting of your choice.

5. Spread the tops of the cupcakes with frosting and serve.

White Chocolate Cream Cheese Frosting

6 ounces white chocolate, coarsely chopped
1 package (8 oz) cream cheese at room temperature
4 tablespoons (1/2 stick) butter at room temperature
1 teaspoon pure vanilla extract
3 cups confectioner's sugar

1. Place the white chocolate in a small glass bowl in the microwave oven on high power for 1 minute. Remove the bowl from the oven and stir with a wooden spoon or a rubber spatula until it is smooth. Set the chocolate aside to cool.

2. Place the cream cheese and butter in a large mixing bowl. Beat with an electric mixer on low speed until well combined, 30 seconds. Stop the machine. Add the melted white chocolate and blend on low speed until just combined, 30 seconds. Add the vanilla and 2 1/2 cups of the confectioner's sugar, and blend on low speed until the sugar is incorporated, 30 seconds more. Add more sugar as needed to make the frosting spreadable. Increase the mixer speed to medium and beat until the frosting is fluffy, 1 minute more.

3. Use to frost the top and sides of the cake of your choice.

Monday, September 7, 2009

Mmmmm, Breakfast

Here comes the first pregnancy craving. Well, not really, but before I went to bed last night, the thought of having coffee cake for breakfast sounded absolutely divine! So I looked for a recipe before bed and found one to make in the morning. The key was easy and have all the ingredients on hand. I was really hoping for one that was like the recipe on the box of the Bisquick container. I would have made that particular recipe, but I am low on Bisquick (mental note to add to grocery list).

This morning, I awoke very excited. I have been in a baking mood since our weather has been less than desirable. It's been cold and rainy so what better way to wake up than a hot piece of coffee cake and a cup of coffee?

This recipe was easy and I do have to say, it was very close to that Bisquick one that I love. Um, plus, I ate three pieces, so I can vouch for it's tastiness. It's a big pan, so let's hope I don't go overboard. While this is more of a breakfast food, you could certainly have it as dessert too. It's sweet which is the one requirement of a dessert in my house.

Here it is out of the oven.

The whole house smelled like cinnamon and sugar, which is perfectly fine for me. As the title says, it goes perfectly with a cup of coffee. I had some milk too which made me feel a little healthier. All in all, it's not terribly bad for you. As long as you only eat one piece, which I didn't. The topping is perfectly crispy and soft at the same time, and the cake part baked up beautifully.

All Recipes has done it again. A tasty dish that is easy to make. It seriously is my favorite site for finding tried and true recipes. One day I will probably run across one that isn't so great, but for now, I will take my chances.

Aunt Annie's Coffee Cake
from: www.allrecipes.com

2 cups flour
3/4 cup white sugar
2 teaspoons baking powder
1/2 teaspoon salt
1/2 cup butter
1 egg
3/4 cup milk, or as needed
1 1/2 teaspoons vanilla extract

1/4 cup flour
2/3 cup sugar
1 teaspoon ground cinnamon
1/4 cup butter

1. Preheat oven to 350 degrees. Grease and flour a 9x13 inch pan. Make the streusel topping: In a medium bowl, combine 1/4 cup flour, 2/3 cup sugar and 1 teaspoon cinnamon. Cut in butter until mixture resembles coarse crumbs. Set aside.

2. In a large bowl, combine 2 cups flour, 3/4 cup sugar, baking powder and salt. Cut in butter until mixture resembles coarse crumbs. Crack an egg into a measuring cup and then fill milk to make 1 cup. Stir in vanilla. Pour into crumb mixture and mix just until moistened. Spread into prepared pan. Sprinkle top with streusel.

3. Bake for 25 to 30 minutes or until a toothpick inserted into the center of the cake comes out clean. Allow to cool.


The corner piece in all it's delicious glory.


Sunday, July 5, 2009

Pie!

I have never met a pie I didn't like. Well, maybe coconut cream......although, in a pinch, I will eat it. To be patriotic without being cliche (apple pie - not that there is anything wrong with it!), I wanted to make an Independence Day dessert that was "American". Who doesn't associate blueberry pie with America?

To be honest with you, I have never made a berry pie before. I have made pumpkin, apple, chocolate, spaghetti pie (see my next post) and even meat pies. Never a blueberry.

As much as I love making crust from scratch, I cheated here. I used refrigerator pie crust. Now before you scold me, have you tasted the Pillsbury stuff lately? It's very good! And unless you told someone it was store bought, chances are, they probably won't notice the difference. Another reason for my laziness with the crust is that I just don't have a place to roll out a pie crust. I don't need to post pictures of my kitchen again do I?

Luckily for me, I found blueberries at Costco. They were excellent quality, hardly any of them needed to be de-stemmed and only about three needed to be thrown away because they were mushy. Here's the only bummer: There were no blueberries left. I really wanted to make muffins or something. That's okay. I know where to buy large quantities of blueberries next time.

I went to the authority on baking for this recipe. Betty Crocker. She never seems to mess around when it comes to yummy baked goods. On another note, we nickname my sister Becky Crocker because she loves to bake. She even has an apron embroidered with Becky Crocker.

This was a very simple recipe to put together. Dump the blueberries, mix the dry ingredients, pour into the prepared crust, sprinkle with two other ingredients and bake. Voila! One delicious, very nutritious (with the exception of the sugar) pie. Did you know that blueberries are one of the best fruits you can eat? They are loaded with antioxidants. So, I didn't feel guilty when I stuffed my face with this pie last night.

Now, how is that I can never find my pie plate? I think it's because the times I do make a pie are at Thanksgiving and I typically leave the pie plate at my aunt's. I bet she has a huge collection of plates thanks to me. I should start writing my name on them in Sharpie or something. It is an expensive habit to continually buy pie plates.

Happy Indepedence Day! Now, where is that leftover pie?

Blueberry Pie
from: Betty Crocker

pastry for two-crust pie
3/4 cup sugar
1/2 cup flour
1/2 teaspoon ground cinnamon, if desired
6 cups blueberries
1 tablespoon lemon juice
1 tablespoon stick margarine or butter

1. Heat oven to 425 degrees. Prepare pastry.

2. Mix sugar, flour and cinnamon in a large bowl. Stir in blueberries. Turn into pastry-lined pie plate. Sprinkle with lemon juice. Dot with butter. Cover with top pastry that has slits cut in it; seal and flute. Cover edge with 2-3 inch foil strips to prevent excess browning. Remove foil during last 15 minutes of baking.

3. Bake 35 to 45 minutes or until crust is brown and juice begins to bubble through slits in crust. Cool in pie plate on wire rack.

I have never seen a berry pie that is cut that isn't oozing out the side. Unless you are a food photographer. Or maybe a professional baker.

Saturday, June 13, 2009

The Go-To Dessert

If there is always one thing you can count on, it's me posting a brownie recipe. It's been a while since my last one (with the exception of the Two-Bite Brownies) and I felt in the mood for some brownies, so here you go!

This is a new recipe and I was on the hunt for one that didn't use butter. The husband used the last of the butter for his popcorn the other night. So, I found one that uses oil instead. I love how brownies are simple to make, curb the chocolate craving and use ingredients that I always have on hand.

I substitued canola oil for the vegetable oil. Old habits die hard I guess. I used to use vegetable oil, but since I joined Weight Watchers years ago, I have learned to use canola instead. It's better for your heart. The only other thing I did was not flour the pan. I just sprayed it with some cooking spray and called it good. Even though I am not really watching calories, I still have those old habits to use whatever is healthier.

Like the name implies, these brownies were fudgy. They were excellent with a glass of milk. Hey, you need a healthy side for something like brownies, right? You can see that the edges are a little "puffier" then the middle. That's because I usually take my brownies out of the oven a little short. You might think it's gross, but I like my brownies slightly moist (aka: gooey) in the center. That made them extra-fudgy.

So, my chocolate craving is cured. For at least an hour.

Fudgy Brownies

3/4 cup unsweetened cocoa powder
1/2 teaspoon baking soda
1/3 cup vegetable oil
1/2 boiling water
2 cups sugar
2 eggs
1/3 cup vegetable oil
1 1/3 cups flour
1 teaspoon vanilla extract
1/4 teaspoon salt

1. Preheat oven to 350 degrees. Grease and flour a 9x13 inch pan.

2. In a large bowl, stir together the cocoa and baking soda. Add 1/3 cup vegetable oil and boiling water. Mix until well blended and thickened. Stir in the sugar, eggs, and remaining oil. Finally, add the flour, vanilla and salt; mix just until all of the flour is absorbed. Spread evenly in the prepared pan.

3. Bake for 35 to 40 minutes or until a toothpick inserted into the brownies comes out clean. Allow to cool before cutting into squares.

Sunday, April 5, 2009

Regular Size Cupcakes

I think this is my first ever blog entry that posts about cupcakes that aren't gigantic.


I have a learning team meeting for school tomorrow, so I decided to bake. That would get my baking itch satisfied as well as give me the chance to offload some of my goodies. After all, I really don't want a dozen cupcakes in my house. You don't need me to explain why.


This is a recipe that I have posted before, but it warrants a second look. It is my go-to chocolate cake recipe. It is also surprisingly easy, and can be made into a regular cake (8x8 sized pan), or into cupcakes. My mother was not convinced that these would do well in cupcake form, but I proved her wrong. Sorry Mom.


These cupcakes could be easily jazzed up by changing the frosting. Now, don't mess with the buttercream itself. It's just too good to be altered. I am suggesting that you use a different flavored extract. Peppermint for Christmas time, orange for the summer, lemon would be delicious, or how about almond? I am pretty certain that any extract would be good with the chocolate in the cupcakes.


Aren't these guys cute? I left them in their newborn form and decided not to taint them with sprinkles or food coloring. After all, who doesn't love just a plain cupcake? Let the flavor of the cake and the frosting speak.....er taste for itself.

I hope my learning team likes them!


Sour Cream Chocolate Cupcakes
from: Pachey's Family Recipe


1 egg
1 cup sugar
1/2 cup cocoa
1/2 shortening (I used butter)
1 teaspoon baking soda
1.5 cups flour
1 teaspoon vanilla
1/2 teaspoon salt
1/2 cup sour milk (if you don't have sour milk, add a teaspoon of vinegar to the milk)
1/2 cup boiling water


* Put ingredients in order given. Beat. Pour into cupcake pans, filling the pan 2/3 full.
* Bake at 350 degrees for 20 minutes.


Frost with Buttercream Frosting

1 pound confectioners sugar
5 tablespoons butter, softened
dash salt
teaspoon vanilla
milk (depending on consistency)


* Blend ingredients in mixer. Add milk to desired consistency. Frost cooled cupcakes.

Sunday, March 1, 2009

Another Strange Combo

Heaven Sent Brownies. That is what these are titled. Curious name, even more curious ingredients. Do you remember my post from last weekend where I was foraging for ingredients? Well, these brownies are a result of my foraging. I had one egg, no brown sugar and not very much oil.

So, the result was searching on www.allrecipes.com for a brownie recipe. Seriously, brownies are my go-to dessert. I never get tired of them. Never. And I like to try new ones often.

These weren't bad. The husband turned his nose up at them based on the sweetener. He's not a honey fan. Yes folks, I said honey. The honey was definitely noticeable in this recipe. If you don't like honey, I don't suggest making these. Or, if you do, don't use a strong honey like I did. I used an organic honey and it was very noticeable. But not in a bad way, I promise! The combination of honey and chocolate was very good.

I followed the recipe exactly, except I added walnuts. Okay, so I guess that isn't exactly. I had some walnuts on hand from a recipe long ago, so rather than let them go to waste, I added them to the batter.

I love thick brownies, and these guys were sure thick! If you use the 8x8 pan, you will get big brownies. Of course, you can always use a different pan. There is no rule. Just remember to change the baking time if you use a larger pan.

The husband took one bite and said "These are all your's. Yuck". Guess what? More for me! Hahahahaha! Wait, it's not nice to laugh. Especially when I will probably gain 5 pounds for eating the whole pan.

Heaven Sent Brownies
from: www.allrecipes.com (submitted by Ryan)

1 1/3 cup flour
1/2 cup unsweetened cocoa powder
1 cup white sugar
1.5 teaspoons baking soda
1/4 cup vegetable oil (I used canola oil)
1/2 cup water
1/3 cup honey, warmed slightly
1 teaspoon vanilla extract
1.5 teaspoons distilled white vinegar
1/2 cup semisweet chocolate chips

1. Preheat oven to 350 degrees. Grease and flour an 8x8 inch pan.

2. In a medium bowl, stir together the flour, cocoa, sugar and baking soda. Make a well in the center and pour in the oil, water, honey, vanilla and vinegar; mix well. Fold in chocolate chips. Spread evenly in the prepared pan.

3. Bake for 25 to 30 minutes in the preheated oven, untl brownies spring back when lightly touched. Let cool in the pan for at least 10 minutes before cutting into squares.

In honor of my love for the end piece of the brownie. Here's a picture.

Oatmeal, Raisin and.......Chocolate?

I know, strange combination. And I also know that I have said that before on my blog several times. Ie; shrimp and grits, mayonnaise and chicken, and bacon and pasta. So, that being said, I thought oatmeal, raisin and chocolate was an odd pairing (or is it thirding since that is three ingredients?).

I wanted something sweet today, and something to take along to my in-law's since we are heading over there for dinner. I am too lazy to make cookies, so I thought, "Hmm, I wonder if there is a recipe for oatmeal raisin muffins on the internet somewhere?" Well, I found one. Thank you trusty allrecipes.com! This recipe had all the yumminess of oatmeal raisin cookies but in a muffin form. Also, it had a couple of tablespoons of cocoa, which I thought was unique.

I was under a bit of pressure, because I haven't done the grocery shopping for the week (bad Pachey), and I was limited with ingredients. I had one egg on hand, not very much milk, no brown sugar and was running low on oil. That severely limited the choices that I had. It must have been divine intervention because this recipe only took one egg! And only a cup of milk!! And only 1/4 of oil!!! Can you tell I am excited? Even better, it doesn't have a lot of sugar, which makes it diet-friendly.


Between rinsing out towels and cleaning soap suds out of my washer (that's a story for another time), these muffins were baking. The house smelled like a combination of brownies and oatmeal raisin cookies. When they came out of the oven, they were dark, but not dark enough to tell that they contained cocoa powder.


Mmmmm, they are good! Very easy to put together, and I would classify them as a muffin for any time of day. They have oatmeal and raisin in them, so they are appropriate for breakfast. Plus, with the addition of the chocolate, they are good for an after dinner treat too! That is why I labeled this one as Dessert and Breakfast


I hope my in-laws like them. They are traditionalists and frown upon anything new. Well, I might just have to break them of that trait.


Chocolate Raisin Oatmeal Muffins
from: http://www.allrecipes.com/ (submitted by CHEWLY)


1.5 cups flour
1 tablespoon baking powder
2 tablespoons unsweetened cocoa powder
1 cup rolled oats
1/2 cup white sugar
1/4 teaspoon salt
1 cup raisins
1 cup milk
1 egg
1/4 vegetable or canola oil


1. Preheat oven to 400 degrees. Grease a muffin pan or line with paper muffin liners. Stir together flour, baking powder and cocoa powder. Set aside.


2. In a large bowl, stir together the rolled oats, sugar and salt. Mix in the other dry ingredients and raisins. Add the milk, egg, and oil. Mix until just blended. The batter will be lumpy. Spoon batter into the prepared muffin cups.


3. Bake for 15 to 20 minutes or until a toothpick inserted in the center comes out clean. Remove from cups to cool on a wire rack.

Saturday, February 7, 2009

Taste of Summer

Doesn't this shortcake look delicious? I know right? I wish I could eat it. I did eat it. Several months ago. In honor of the beautiful weather that we are having today, I thought I would post this strawberry shortcake. I wish I could have some right now, but I don't have any strawberries. Or whipped cream. Or biscuits actually.


This is my favorite dessert to eat in the summer time. After a nice barbeque of cheeseburgers and potato salad, nothing is better than fresh strawberry shortcake. Unless it's a nap from the carb overload.

At any rate, here is my strawberry shortcake recipe. It's simple. And to make myself feel better, since I can't eat shortcake, I will now go microwave my Betty Crocker Warm Delight Mini.

Strawberry Shortcake
from: Pachey

2.25 cups Bisquick
2/3 cup milk
2 pints of strawberries
pint of heavy whipping cream
sugar to taste

Heat oven to 450. Stir Bisquick and milk until soft dough forms. Place on surface sprinkled with flour. Knead 10 times. Roll dough 1/2 inch thick. Cut with biscuit cutter. Place on ungreased cookie sheet or in a cake pan. Bake 8 to 10 minutes or until golden brown.

Hull and slice strawberries. Place in a bowl. Sprinkle with sugar (to taste). Some people prefer more tart strawberries. Some people like them sweet. I prefer them somewhere in the middle. Cover and refrigerate so they can macerate.

Pour whipping cream into a mixer and whip until cream forms. Add a tiny bit of sugar to make sweetened cream.

Assemble shortcakes. I like to cut a biscuit in half and top with strawberries and a ton of whipped cream.
By the way, have I mentioned lately that I have lost 15 pounds so far? Go me!

Sunday, February 1, 2009

Redemption!

After the disaster (well, sort of) that I call dinner, I needed a pick-me-up. My sister posted on Facebook about a 5-minute chocolate cake recipe that you make in the microwave. Score! I needed something simple and fast, and this definitely did the job.

I thought, wow, this cake can't be very good if you are making it in the microwave, but it was surprisingly good! It still needs "something" although I am not sure what. If you have any ideas on how to make this better, I would love to hear it.

This takes very little dishes. Just a mug, spoon and a tablespoon measuring spoon. That's it! Unless you want to eat your little cake on a plate, you can actually use less dishes and eat it straight out of the mug.

Thank you to my sister and thank you to Etsy where this recipe came from.

5-Minute Mug Cake
from: Rebecca and Etsy.com

4 tablespoons flour
4 tablespoons Splenda
2 tablespoons baking cocoa
1 egg
3 tablespoons milk
3 tablespoons canola or vegetable oil
3 tablespoons chocolate chips (optional)
dash of vanilla

* Add dry ingredients in microwave safe mug. Mix well. Add egg, mix thoroughly.
* Add milk and oil; mix well.
* Add chocolate chips and vanilla; mix well.
* Microwave for three minutes. The cake will rise, but watch it carefully to make sure it doesn't overflow.
* Let sit for 2 minutes. Tip onto a plate or eat right out of the mug.


Look how cute this is! It's almost as cute as a cupcake. I love how it's shaped like the mug it came from. I happened to use my favorite Walt DisneyWorld coffee cup.

Saturday, January 10, 2009

Double Chocolate Goodness

I am not going to lie. These were a pain. Not to mix together, but to get onto the baking sheet. The dough was so sticky! It resembled cookie dough more than biscotti dough. If you can get past the poopy fingers, this recipe is a good one!

Anything that is titled Double Chocolate is sure to be a hit right? Cooking Light is my favorite magazine, and they didn't disappoint with this recipe. The picture is incredibly beautiful (of course), which led me to make it. Plus, I had all the ingredients on hand. That always is a nice surprise.

If you don't have a kitchen scale (mental note: buy kitchen scale), that's okay. The flour in the recipe measures out to about 1.5 cups. It takes such ordinary items from your pantry and you are bound to have everything you need to make them. I had leftover mini-chocolate chips from the last time I made biscotti, so I didn't have to buy any.

Here are the results of the biscotti after the first go-round in the oven:


These would be wonderful dunked in a cup of coffee, a la Italian style, or eaten by themselves as a snack or dessert. Now, if I can just hold myself back from eating the whole batch. That wouldn't be low fat or low calorie after all.

Double-Chocolate Biscotti
from: Cooking Light December 2008

6.75 ounces flour (about 1.5 cups)
1 cup sugar
1/2 cup unsweetened cocoa
1/2 cup semisweet chocolate minichips
1/2 teaspoon baking powder
1/2 teaspoon baking soda
1/2 teaspoon salt
1 teaspoon vanilla extract
2 large eggs
1 large egg white

1. Preheat oven to 350 degrees.

2. Weigh or lightly spoon flour into dry measuring cups; level with a knife. Combine flour and next 6 ingredients (through salt) in a medium bowl, stirring with a whisk. Combine vanilla, eggs, and egg white in a large bowl, stirring with a whisk. Add flour mixture to egg mixture; stir until well blended. Divide dough in half. Turn dough out onto a baking sheet coated with cooking spray. With floured hands, shape each dough half into a 12-inch-long roll; pat to 1/2 inch thickness.

3. Bake for 22 minutes. Remove rolls from baking sheet; cool 10 minutes on a wire rack. Cut each roll diagonally into 18 (1/2 inch) slices. Carefully stand slices upright on a baking sheet. Bake biscotti an additional 15 minutes or until almost firm (biscotti will be slightly soft in center but will harden as they cool). Remove biscotti from baking sheet; cool completely on wire rack.

Sunday, December 7, 2008

Lighter Muffins

I had some overripe bananas on hand, and knowing that I hate to throw food away, I wanted to use them. So, I debated: Banana bread or banana muffins? In the end, the muffins won. I found a recipe on http://www.allrecipes.com/ that I could use, but I made some modifications to it. Why? Because I wanted a muffin with less Points than the recipe called for. Plus, if you scrimp on Points, you can add tasty extras like oh, mini chocolate chips. Tee hee.


As I looked over the recipe, I thought "Hmmm, what could go in this to help cut down some of the calories?". I remembered that I had some wheat germ on hand, which could substitute some of the flour. To cut calories even further, in place of the sugar, I used Splenda. Of course, these substitutions are completely not necessary, but again, chocolate chips anyone?

This recipe is light because it doesn't use oil or butter. The bananas act like the moisture in that respect. When you stir the ingredients together, the batter is very thick, but that's okay. They will turn out like muffins in the end.

My substitutions did me well. These are tasty muffins. If you heat them up in the microwave for 10-15 seconds, they are even better. You can't really tell they are healthy. Even the hubs liked them. Of course, he isn't getting his hands on anymore of them since he has Gingerbread Loaf from Starbucks to consume. Muffins=Mine!

Lighter Banana Chocolate Chip Muffins
from: Pachey

2 eggs, beaten
3 very ripe bananas, mashed
1.5 cups flour
1/2 cup wheat germ
1 teaspoon salt
3/4 cup Splenda
1 teaspoon baking soda
1/4 cup mini chocolate chips
1. Preheat oven to 350 degrees. Lightly grease or line 12 muffin cups.

2. In a medium bowl, combine eggs and bananas. In a separate bowl, mix together flour, wheat germ, salt, Splenda, and baking soda. Stir in banana mixture. Fold in chocolate chips. Pour batter into prepared tins.

3. Bake for 20 to 25 minutes or until a toothpick comes out clean.

Sunday, October 26, 2008

The Perfect Crunch

How many of you have tried biscotti from a coffee shop? I usually don't buy it, because it's way too crunchy for my liking. Even after dunking it in a cup of coffee, it hurts my teeth. There is one place here in Portland that makes biscotti that doesn't break your teeth, but that is another story.

I made the perfect biscotti today. Just crunchy enough, but still a teeny bit soft in the middle. It has mini chocolate chips in it to give just enough chocolate flavor. It's the perfect crunch to go with that hot cup of coffee or tea.

Did you know that biscotti translates to Itwice cooked in Latin? It comes from the words bis coctus. I just like to refer to them as Italian biscuits. In England, aren't biscuits cookies? It always makes me smile when my mom talks about having digestive biscuits on her trips to London.

This recipe is easy to make, and as the name implies, it is twice cooked. You first start out by mixing the ingredients, and then forming them into a log. After that you bake the log, slice when cooled and bake again. The results are tasty!

Biscotti before baking:
After baking. It puffs up a little.

Because I am an independent thinker (also known as stubborn), I don't cut the biscotti crosswise on a diagonal as the instructions indicate. I don't do this because I like all my biscotti to be equal size. There will be no skimping here! So, it's easier for me to cut in half, and in half again. The four quarters will each equal five biscotti. For people that aren't good at math, that is 20 biscotti total.

So, enjoy a biscotti with a cup of coffee, tea, or even as a sweet treat after dinner. There will be no teeth breakage here.

Chocolate Chip Biscotti
from: Weight Watchers

2 cups flour
1 teaspoon baking powder
1/2 teaspoon salt
3 tablespoons mini chocolate chips
1 cup sugar
2 eggs
1 teaspoon canola oil
1 teaspoon vanilla extract

1. Heat oven to 325 degrees. Lightly coat a large baking sheet with cooking spray.
2. In a medium bowl, whisk flour, baking powder and salt until combined. Stir in chocolate chips and set aside.

3. With an electric mixer, beat eggs, sugar, oil and vanilla until frothy, about 2 minutes. Stir the dry ingredients in just until moistened and dough forms. Shape the dough into a 13x3 inch log on baking sheet.

4. Bake log 30 minutes and set aside to cool for 10 minutes. Reduce oven to 300 degrees.

5. Cut warm log crosswise on a slight diagonal into 1/2 inch thick slices. Stand slices, about an inch apart, on baking sheet and return to oven for 12 minutes. The centers will be soft, but biscotti will crisp when cooled.